How to Make a No-Sew Door Draft Stopper
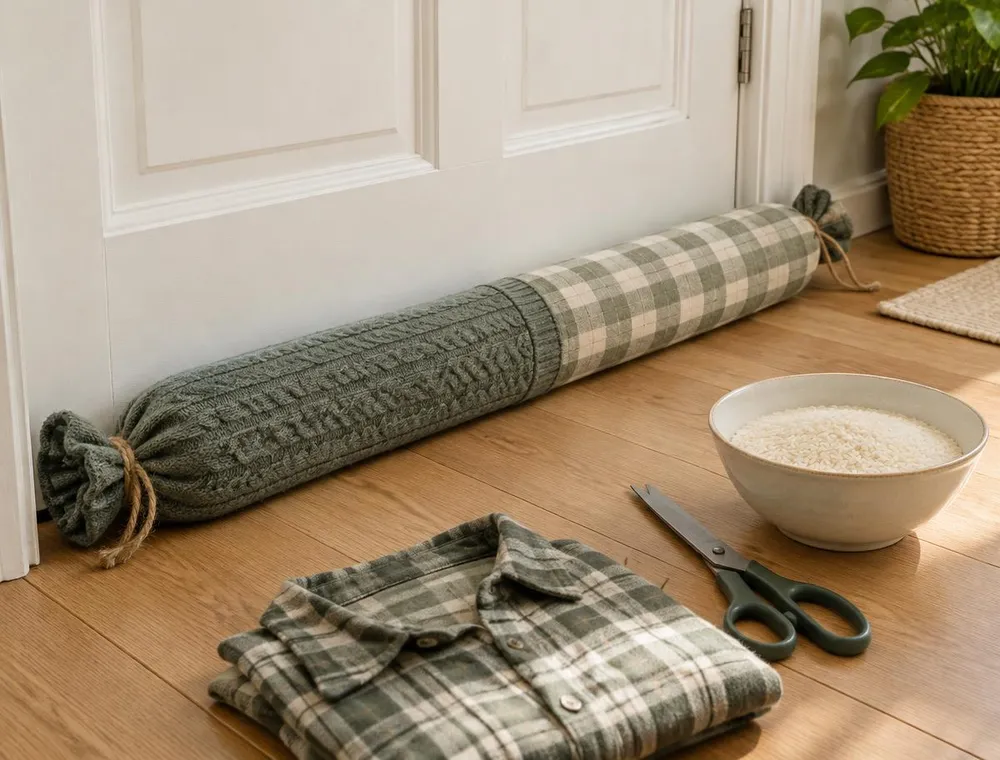
Stop cold air sneaking under your doors with a soft, weighted draft stopper made from old clothes. No sewing machine, no needle, just a little cutting, filling and tying.
- Difficulty
- Easy
- Time
- 1–1.5 hours
- Published
Introduction
If you have ever sat near a door on a winter evening and felt a thin stream of cold air around your ankles, you already know why draft stoppers exist. Gaps under interior and exterior doors let warm air escape and cold air in, and the room never quite feels comfortable no matter how high the heating goes.
A draft stopper, sometimes called a draft excluder or draft snake, is simply a weighted fabric tube that lies against the bottom of the door and blocks that gap. Shop-bought versions work well, but they are easy to make yourself from things already in the house. An old jumper with worn elbows, a pair of jeans that no longer fit, or a spare pillowcase all make good covers, and the whole thing can be put together without a single stitch.
In this guide you will measure your door, make a filled inner tube that won't leak, slip on a fabric cover and close the ends with twine or fabric glue. There are also notes on which fillings work best, why some draft stoppers keep sliding away from the door, and how to make one that can be washed.
Materials and Tools
Materials
- Fabric for the outer cover: an old jumper (two sleeves joined together), a jeans leg, a pillowcase, or a strip of sturdy fabric about 35 cm (14 inches) wide and 15 cm longer than your door is wide
- An inner liner: an old pair of thick tights, a long sock, a narrow pillowcase, or a fabric tube made from an old T-shirt
- Filling: dry rice, dried beans or lentils for weight, plus fabric scraps, old socks or polyester stuffing for bulk
- Small zip-top food bags (optional, to keep grain filling dry and contained)
- Strong twine, ribbon or thick rubber bands for closing the ends
- Fabric glue or iron-on hemming tape (optional, for a neater finished end)
Tools
- A tape measure
- Sharp fabric scissors
- A large plastic jug, or a funnel made from rolled card, for pouring in filling
- An iron, if you are using hemming tape
- Clothes pegs to hold fabric while glue dries
Before You Start
- Find out where the draft is actually coming from. On a windy day, hold a strip of tissue paper or a feather near the bottom of the closed door and watch where it moves. Sometimes the bigger leak is at the sides or the hinge edge, which a draft stopper alone won't fix.
- Measure the width of the door from one edge to the other, and the height of the gap under it. Most interior doors are between 70 and 90 cm (about 28–36 inches) wide.
- Wash and dry any old clothes you plan to use. It removes dust and body oils, and any shrinkage happens now rather than after you have filled the tube.
- Decide whether you want the stopper to be washable. If so, keep the inner liner and the outer cover separate so the cover can be slipped off and washed on its own.
Step-by-Step Instructions
Step 1: Work out the finished size
Make the finished tube about 2–5 cm shorter than the width of the door, so it sits neatly inside the frame without catching on the hinges. For thickness, aim for a diameter of roughly 7–10 cm (3–4 inches). A thicker tube blocks larger gaps but can be harder to push along the floor when the door opens.
Step 2: Prepare the outer cover
A jeans leg is often long enough on its own: cut it to the door width plus 15 cm, so you have 7–8 cm spare at each end for tying. Jumper sleeves are usually too short, so cut both sleeves off, then slide the cuff end of one sleeve about 10 cm inside the shoulder end of the other and secure the overlap with a line of fabric glue. If you are using flat fabric, lay it face down, run a strip of fabric glue or iron-on hemming tape along one long edge, roll it into a tube and press the edges together firmly.
Step 3: Make the inner liner
The liner keeps the filling in one place and stops grains escaping through loose knits. Thick tights work very well: cut off one leg, or use both legs tied end to end for wide doors. A narrow pillowcase or a T-shirt rolled and glued into a tube also works. The liner should be slightly narrower than the cover so it slides in easily.
Step 4: Choose your filling
The best draft stoppers combine weight and bulk. Weight keeps the tube pressed against the door and floor; bulk fills the gap. A good mix is rice, beans or lentils for weight, with fabric scraps, old socks or stuffing for the rest. If you are worried about damp, put the grain into small zip-top bags first. Avoid loose sand on its own: it is very heavy and leaks through the smallest hole.
Step 5: Fill the liner in sections
Tie a knot in one end of the tights or liner. Pour in about 15–20 cm worth of filling, shake it down, then tie a loose knot or wrap a rubber band around the liner to close off that section. Repeat until the liner is the right length. Filling in sections stops everything slumping to one end, and lets the stopper bend slightly to follow an uneven floor.
Step 6: Close the liner
When the liner reaches your finished length, tie off the end with a tight double knot or a rubber band wrapped several times. Lay it on the floor and roll it under your palms to even out any lumps. It should feel firm but still slightly squashy, like a bean bag.
Step 7: Slide the liner into the cover
Gather the outer cover over your arm like a sock, hold the end of the liner, and gently pull the cover down over it. Centre the liner so there is roughly the same amount of empty fabric at each end.
Step 8: Close the ends without sewing
Gather each end of the cover tightly against the liner and tie it with twine or ribbon, wrapping it three or four times before knotting. Trim the fabric beyond the tie to about 3–5 cm so it looks neat. For a flatter finish, fold the raw edges inward and seal them with fabric glue, holding them with clothes pegs until dry, or fold and press with iron-on hemming tape.
Step 9: Test it at the door
Lay the stopper along the bottom of the closed door on the side where the cold air comes in. Check with your tissue strip again. If air still escapes at the ends, the stopper may be too short or too light in that area. Open and close the door a few times to make sure the stopper doesn't get caught underneath.
Helpful Tips
- Patterned or textured fabric, like a cable knit or a check, hides creases and lumps better than plain smooth fabric.
- For an outside door, use a hard-wearing fabric such as denim or canvas. Knits can get soggy if rain blows under the door.
- Add a ribbon loop to one end and hang the stopper on a hook when you don't need it, which keeps it clean and dry in warmer months.
- If you want the stopper to move with the door, make two slim tubes and join them with a strip of fabric glued underneath, so one tube sits on each side of the door with the strip passing under it.
- A few drops of lavender or cedar oil on the fabric scraps give a light scent and can help keep moths away from wool.
- Make one for each door that leads to a cold hallway or an unheated room. They work best together.
Common Mistakes to Avoid
Making the stopper exactly the width of the door
A full-width tube catches on the frame and hinges. Make it a few centimetres shorter so it sits inside the door opening.
Using only soft filling
A tube filled with nothing but stuffing is too light and gets pushed away every time the door moves. Add some rice, beans or lentils for weight.
Pouring grain straight into a loose knit
Rice slips through knitted jumpers and old tights with ladders in them. Always use a tight inner liner, or bag the grain first.
Overfilling the tube
A rock-hard tube doesn't mould to the floor, so air leaks underneath it. Leave a little give so it settles into the gap.
Placing it on the wrong side of the door
The stopper usually works best on the side the cold air comes from. If the door keeps dragging it underneath, try the other side.
Troubleshooting
The draft stopper keeps sliding away from the door
It is too light or too round. Add more grain to each section so it sits flatter and heavier, or place a strip of non-slip rug grip underneath it on smooth floors.
Air still gets through at both ends
The tube is probably too short, or the filling has shifted away from the ends. Add an extra section at each end, or tie the end sections more tightly so they stay full.
The filling has bunched up in the middle
The liner wasn't divided into sections. Untie one end, spread the filling out again and tie knots or rubber bands every 15–20 cm to hold it in place.
The fabric glue didn't hold
Fabric glue needs pressure and time. Peel away the old glue where possible, reapply a thin, even line, clamp it with clothes pegs and leave it overnight before handling. On stretchy knits, tying the ends is more reliable than gluing.
The stopper smells musty after a few weeks
Moisture has got into the filling, which is most common by outside doors. Empty it, let the cover dry fully, and refill using grain sealed in zip-top bags or a non-food filling such as fabric scraps.
The door won't close over it
The stopper is too thick, so the door edge rides up onto it instead of closing against it. Take out some of the soft filling to make it slimmer, and lay it a centimetre or so back from the door so the door can close first and the stopper then sits snugly against it.
Safety Instructions
- Don't block air vents or the gaps under doors to rooms with gas fires, boilers, wood stoves or other fuel-burning appliances. These need a supply of fresh air to work safely.
- Never use a draft stopper in a way that blocks an escape route or makes a door hard to open in an emergency.
- A draft stopper on the floor can be a trip hazard. Keep it close against the door, and choose a colour that stands out from the floor for doors used often, especially in homes with older people.
- Rice, beans and lentils can attract pets and pests. Keep food-based fillings sealed, and use non-food fillings in homes with dogs that chew.
- Small children could choke on spilled grains or beans. Check the tube regularly for holes and keep it away from babies.
- Keep the stopper away from heaters, hot radiators and open flames.
Frequently Asked Questions
What is the best filling for a door draft stopper?
A mix of weight and bulk works best. Rice, dried beans or lentils give weight, while fabric scraps, old socks or polyester stuffing give bulk. Many people combine the two in each section.
Can I wash a homemade draft stopper?
Yes, if you keep the liner and cover separate. Untie one end, slide out the liner, and wash the cover as you would the original garment. Don't wash a liner full of rice or beans, as they will swell and spoil.
How long should a draft stopper be?
Make it two to five centimetres shorter than the width of the door so it fits neatly inside the frame. For a typical interior door, that is usually somewhere between 65 and 88 cm.
Do draft stoppers actually help keep a room warmer?
They help by blocking cold air coming in under the door, which is often a noticeable source of drafts. How much difference you feel depends on the size of the gap and the other leaks in the room, such as windows and letterboxes.
Can I make one without any filling at all?
You can roll up an old towel or blanket tightly and slip it into a cover. It works as a quick fix, but it is lighter and less even than a filled tube, so it may move more easily.
What old clothes work best for the cover?
Jeans legs, thick jumper sleeves, flannel shirts and canvas fabrics all work well. Very thin or stretchy fabrics like old T-shirts are better used for the inner liner.
More Projects to Try
How to Sew a Loose Button Properly
Before you cut up an old shirt, check whether a missing button is the only thing wrong with it. It might just need a quick repair.
Soy Wax Candles Poured into Thrifted Teacups
Make your newly draft-free room even cosier with a set of handmade candles.
Easy Wooden Floating Shelf from a Single Pine Board
Another practical home project that is easy for beginners and makes a real difference to a room.
Conclusion
A homemade draft stopper is a small project with a result you feel straight away, especially on a cold evening. It gives worn-out clothes a useful second life, takes about an hour, and needs nothing more complicated than scissors and some twine. Once you have made one, it is easy to make a matching set for every chilly doorway, each one using up a different old jumper or pair of jeans.
Related articles
More home decoration
How to Grow New Plants from Stem Cuttings
Turn one healthy plant into several. Learn where to cut, how to prepare stems, how to root them in water or soil, and how to help them settle once they are potted.

Soy Wax Candles Poured into Thrifted Teacups
Turn odd teacups from a charity shop into pretty candles with soy wax, cotton wicks and a careful double-boiler method.

Easy Wooden Floating Shelf from a Single Pine Board
Build a clean, bracket-free shelf using a pine board, a hidden batten and basic tools. Ideal for plants, books and small decor.